


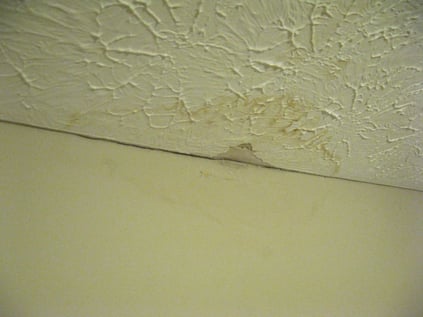
 Water stains, if you catch them early, can be taken care of with minimal effort.
But what is causing them is the big question.
Water stain repair doesn't start with breaking out the brush and paint bucket. It starts with some investigating to find out the source of the problem first.
Where's The Water Coming From?
Roof Leak - The average asphalt shingle roof will last at least 20 years, whereas a metal or tile roof can last a lifetime. But even if your roof isn't old, that doesn't mean it can't leak.
Tiles and shingles can become damaged in severe weather so doing an occasional inspection from the ground can help you to catch a problem before it becomes a bigger issue.
Leaky Roof Flashings & Sealants - Any type of protrusion from your attic through the roof (plumbing vent stack, attic ventilation, chimney, etc.) requires some type of flashing to seal the gap between the protrusion and the roofing material itself so it doesn't leak.
These are prime areas for problems to occur, because the flashings as well as the sealants used to install them are susceptible to the effects of weather and time. Having these areas inspected periodically is also good practice to ensure they are doing their job and not allowing water into your home.
Overflowing Gutters - This one's pretty self-explanatory. Depending on how many trees are hanging over your roof you may need to clean your gutters out as much as twice a year. Gutters that don't drain properly can also lead to foundation water issues and problems with ice dams if you live in colder climates.
Loose Plumbing Vent Pipe - This one actually happened to me at my home recently. People don't think about there being plumbing pipes in their attic but the plumbing in your home is a system and it must be ventilated by running a pipe or pipes through your roof to allow air to enter the plumbing system so your drains flow properly.
The problem I ran into in my own home was that the person who installed my vent stack didn't glue the PVC pipes together at the joints and a horizontal section that was holding rainwater came apart. That section of vent pipe wasn't pitched correctly so the water would run down to the sewage system. Believe it or not that very situation happens more often than you might think.
How To Fix It
Assess The Damage
For there to be water stains there had to have been water. If you can access your attic, make a trip up to determine the extent of the water damage. Is there standing water on the attic's floor that needs to be removed?...Is there attic insulation that's wet and needs to be replaced?...Is the drywall soft to the touch and/or separated from the ceiling joists where it is supposed to be attached?
These are all things that must be addressed before you can go any further. Just be careful when you're walking around your attic. One wrong step and you'll be back below deck in a hurry and learning how to patch a large hole in a drywall ceiling.
The Materials Must Be Dry
Once you've fixed the cause of the water problem and assessed the extent of the damage, your next concern is making sure the materials affected get thoroughly dried.
If the drywall is still in good shape you should remove any insulation from above the ceiling to allow it to get good air flow so it and the surrounding ceiling joists can dry out -- using a box fan to the aid in the process if necessary.
It's advisable to be reasonably certain that all materials have returned to a safe level of moisture content before you replace the insulation, and certainly before you paint. You can purchase an inexpensive pin-type moisture meter from your local hardware store and test the wood and drywall of the affected area against that of the surrounding areas for confirmation.
If you find any mold or mildew now is the time to take care of it before you go any further.
Making It Look Pretty
If the drywall has pulled loose from the structure you can re-attach it using some drywall screws.
Preparing a ceiling for painting is a very similar process to preparing walls for paint. Fix any holes and damaged joint tape, scrape away any loose or peeling paint, then apply a coat of a stain-blocking primer over the water-stained area before you paint, otherwise the stain will just end up bleeding through your new paint job.
A couple of products I like for the job are Zinsser's Oil-Base Cover Stain and Zinsser's BIN Primer. I think BIN works better but Cover Stain stinks much less. Either way, be sure to get some fresh air moving when you're applying them.
As soon as the primer is dry and the stain isn't bleeding through, apply a couple coats of your paint of choice and you have a repaired ceiling.
One final point to mention...if the texture on your ceiling was damaged you can purchase a texture touch-up kit to take care of it.
If you live in the Greater Tampa, Fl area and would like some assistance with your house painting project please give us a call at (813) 570-8800, visit our Contact Us page, or click on the button below to request your free, no-obligation consultation and quote.

photo by: Ed! / CC BY-SA 3.0

Contact the Pros
Ready to get started with your next painting project but unsure if it is in your budget? Reach out to the expert painting team at ImageWorks Painting to schedule a free consultation today. Give us a call at 724-898-2446, or request a visit online.